Category: Baking

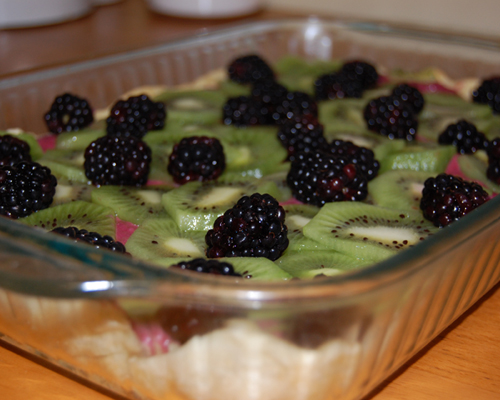
  • Blackberry-Balsamic & Kiwi Tart

    A little over a year ago, I discovered the berry-balsamic combination in all its greatness. I had just bought an ice cream maker, and since all the flavors in the little book seemed boring, I struck out on my own with strawberry-balsamic ice cream. I burned the hell out of the first batch of balsamic reduction, and I thought my roomies would never forgive me for the smell, but it ended up being so delicious that I never looked back.

    After last week’s very-rich-and-creamy chocolate cake, the masses were begging for fruit, and I decided a tart would do the trick. I really like the look of blackberries and kiwis, but any berry would do for this recipe. (Except maybe blueberries. Someone try that and let me know how it goes?) I don’t use shortening if I can help it, so the all-butter crust is courtesy of Paula Deen. The rest is generally my own.

    (Side note: DO NOT try and make pie crust with cake flour. Even if it’s all you have and you really don’t want to run to the store again. It is going to turn into a disgusting, gelatinous goo. Trust me on this one.)
    Blackberry-Balsamic & Kiwi Tart

    Crust:
    1 cup confectioner’s sugar
    3 cups all purpose flour
    3 sticks unsalted butter

    Combine everything until it forms a doughy ball. (Miss Deen uses a food processor, others use a stand mixer. I own neither so used a hand mixer and it worked fine.) Grease a 9×11″ glass baking dish with butter, and pre-heat your oven to 350F. Roll dough on a floured surface until it is pie-crust thin and roughly the same shape as your baking dish. Place crust in baking dish, press the corners in and the sides up, and bake for 10-15 minutes or so until it’s flaky and slightly brown and generally done. Cool on a baking rack.

    Blackberry-balsamic egg custard:
    6 egg yolks, cool
    1/2 cup white sugar
    1/4 cup flour (I DID use cake flour here, and it was fine.)
    4 tablespoons cornstarch
    2.5 cups milk, cream, etc (I use about half heavy cream and about half whole milk, and it is yummy.)
    3 tspn vanilla extract

    18 oz whole fresh blackberries
    1/2 cup white sugar (can be adjusted to suit your berries; I was way out of season and they were TART)
    2-ish tablespoons tapioca granules
    1/4 cup balsamic vinegar

    In a metal bowl, mix the egg yolks, 1/2 cup sugar, flour and cornstarch together until it forms a smooth, light yellow paste. Meanwhile, cook milk and vanilla extract on medium heat until JUST boiling. Remove from heat and add half to egg mixture in bowl, WHISKING CONSTANTLY to prevent sticking (it helps if you have three hands about now.)  Add the new mixture in the bowl back into the hot milk pot and keep on whisking. Return to medium heat and bring back JUST to a boil, and cook for about a minute more until it thickens and becomes hard to stir. Find that magic moment when it is as thick as you can get it without being burnt. Remove from heat, transfer to a clean bowl, and immediately cover and chill.

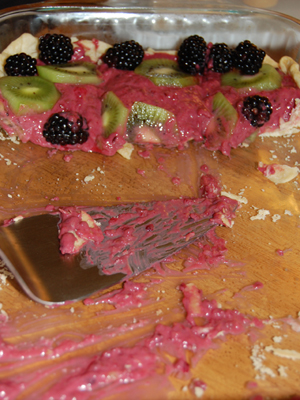
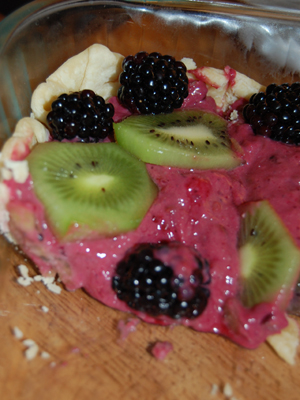
    In a clean saucepan, put the blackberries, remaining sugar, and balsamic vinegar onto medium heat. Mash it a bit with a potato masher to smush up the berries. Gradually add up to 2 tblsn of tapioca to thicken, stirring well. Stir it well throughout, actually, and watch it closely, becuase burnt balsamic vinegar smells really vile. When it reaches a runny-but-jammy sort of consistency, remove from heat. Grab your chilling custard, add the blackberry compote, and beat with an electric mixer until well combined. Re-cover and put back in the fridge to chill completely through before assembling.

    To assemble:
    6 oz blackberries and 6 kiwis, give or take.

    Slice kiwis into thin round slices, place on a plate, and stick in the freezer to chill. Wash the blackberries and stick them in the freezer, too.  When you’re almost ready to serve the tart, spoon the blackberry custard – completely chilled – into the cooled crust, and artfully place the chilled fruit on top. Devour.
    Enjoy!
  • Lumpy Bumpy Toffee Cake

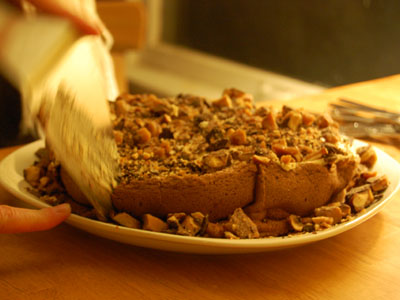
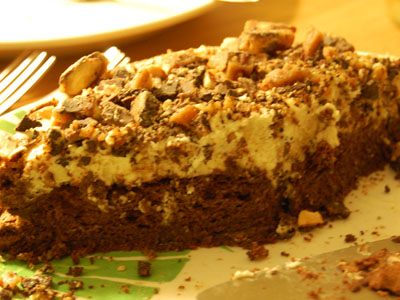
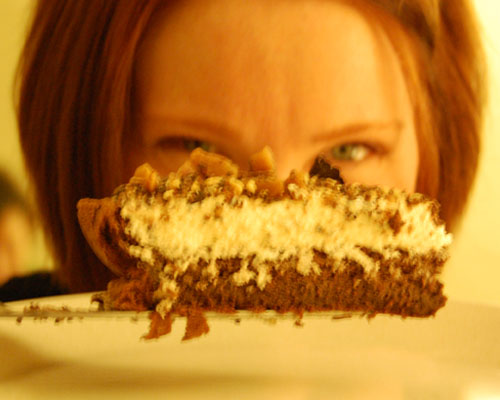
    My friends were pretty excited when I announced that I’d be blogging here – not just because they’re supportive and stuff, but because I also announced that I’d be hosting regular dessert parties in order to have something to write about. This past Sunday was our first: I made Lumpy Bumpy Toffee Cake, a chocolate-mascarpone-Baileys-toffee creation that was even better than I expected… and which, aesthetically, lives up to its ridiculous name.

    I should note that I did not make the toffee myself. Have you ever tried to make toffee? Perhaps some day when I have nothing else to do, I’ll give that a shot. In this case, I already had two other delicious layers to make up, so I left the toffee to a pro: Audra Martin, a local toffee whiz. I bought a small jar of milk chocolate toffee and a small jar of dark, mixed them together in a ziplock bag, beat them into submission small pieces with a rolling pin, and I had my topping.

    As for the rest – this is a combination of about five recipes, inspired by a sort-of similar cake seen at Sugarland in Chapel Hill NC.

    Lumpy Bumpy Toffee Cake

    A chocolate sponge cake with Bailey’s-mascarpone cream and toffee topping.

    For the cake:

    6oz good-quality dark melting chocolate (I use Ghirardelli 60%)
    3 tablespoons coffee
    6 large eggs, separated and brought to room temperature
    2/3 cup white sugar, divided into two 1/3 cup amounts
    1/2 tablespoon salt (I prefer baking with popcorn salt for the texture)

    In a double-boiler, melt the chocolate and the coffee together, then allow to cool almost to room temperature. Don’t force it in the fridge, you’ll mess up the texture. Leave it be, go watch a movie or something, and just let it cool.

    In a large bowl, beat the egg yolks, 1/3 cup sugar, and the salt until it all turns pale and thick. Fold in the melted chocolate.

    In a separate bowl, with clean beaters, beat the egg whites until soft peak form.  Gradually beat in the other 1/3 cup sugar until it just holds soft peaks.

    Gradually fold the egg whites into the yolk-chocolate mixture. Pour batter into a 9″ springform pan and bake at 350F for about 25 min or until a toothpick inserted comes out clean. Cool in the springform on a wire rack.

    A note: this cake is going to deflate while cooling.  One minute it’s filling the pan, then you set it to cool, and suddenly it’s 3″ tall. It’s OK.

    For the cream:

    100ml Baileys Irish Cream
    16oz mascarpone
    2 tablespoon white sugar
    slightly less than 1/2 cup heavy whipping cream (the cream and Baileys should add up to about 3/4 cup liquid)

    In a large bowl, beat the mascarpone and sugar until combined. Add the Baileys and cream, and beat until it reaches a consistency you like. Try not to eat it all before you get around to assembling the cake.

    To assemble:

    Remove the cake from the springform and place it on a serving plate. If yours is anything like mine, your cake will have deflated, leaving a crater in the middle with slightly raised edges. Fill the cake crater with a thick, lovely layer of mascarpone, and top with roughly 2 cups toffee crumbles.

    Enjoy!

  • Hello, Gerbil!

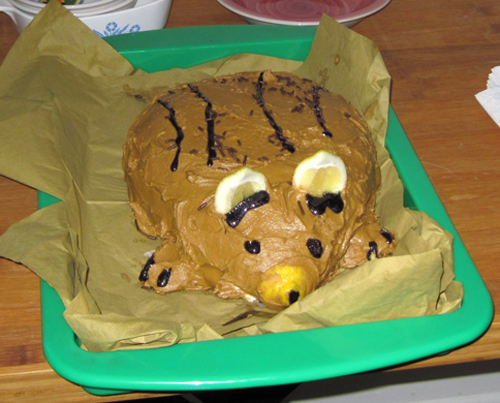
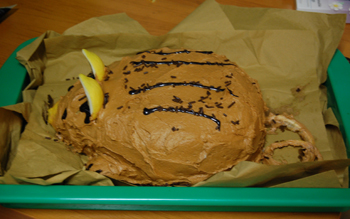
    Gerbil cake!

    Hello, Epic Portions readers!  My name is Megan, and I’m new around here.  I’ve joined up to talk about baking.

    See, I believe in baking creatively.  It’s not really enough for me for something to just taste good.  I think it needs to be creative, either in concept (I like to make up my own recipes based on inspiration), or execution (I like to bake things in the shape of other, more ridiculous things.)  I mean, think about the idea behind baking: take some sugar, and some butter, and some other stuff that tastes good (chocolate, fruit, peanut butter, whatever…) and mix it all together, and try not to burn it too much. It’s generally difficult to manage to bake something that tastes bad. The challenge, for me, is not only making it taste good, but making it interesting.

    So, I submit for your consideration my latest creation, a birthday cake for my friend Jeff, who (at 27, mind you) is kind of obsessed with gerbils.

    Last year, Jeff (a physicist) got a Periodic Table of Cake for his birthday.  That was made of two different kinds of cake (lemon-creme and chocolate-covered-strawberry) cut into individual square cupcakes, frosted in a rainbow of colors, then assembled and decorated to look like a mini periodic table. (Extra effort: the frosting on “arsenic” was laced with well over 1/4cup of cayenne pepper. Spicy!)

    Jeff really enjoyed the lemon-creme from last year and asked for it again this year, so the gerbil cake started as a four-layer 9″x13″ lemon-creme cake with fresh lemon frosting.   My lemon cake is so easy it’s very nearly cheating: boxed lemon cake mix, lemon pie filling, and fresh lemon juice.  Too easy, and so delicious!  The fresh juice tempers the over-sweetness of boxed mix, and gives it a bright, tart lemon flavor.  For frosting, when using lemons I like to keep it simple to let the flavor shine: butter, confectioner’s sugar, and fresh-squeezed lemon juice.   For this cake, it was four 9″x13″ layers of cake and three layers of frosting holding it all together.

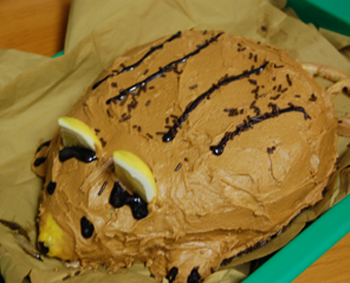
    Once baked and layered, I carved the assembled cake (admittedly, with a little bit of help from my roommate, who was better at achieving the curves) into the shape of an adorable little gerbil.  I frosted it with more lemon icing, (tinted a light kraft-brown with icing dye), and added a lemon-end nose, lemon-slice ears, and a lemon-garnish tail.  I used black decorator’s icing to add details – nose, eyes, stripes and claws – and, voila!  Gerbil cake!

    Gerbil cake!